ATMega328P - Bootloader & Program
The following describes the process to upload a bootloader and control program to a blank ATMega328P microcontroller in one operation using ISP. The microcontroler is using the standard 16MHz crystal clock arrangement as used on the Arduino Uno.
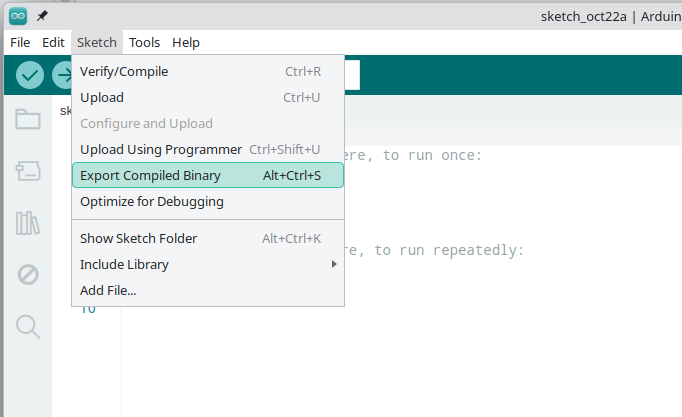
- Get the combined hex file and bootloader. The Arduino IDE will produce these - see Sketch -> Export Compiled Binary.

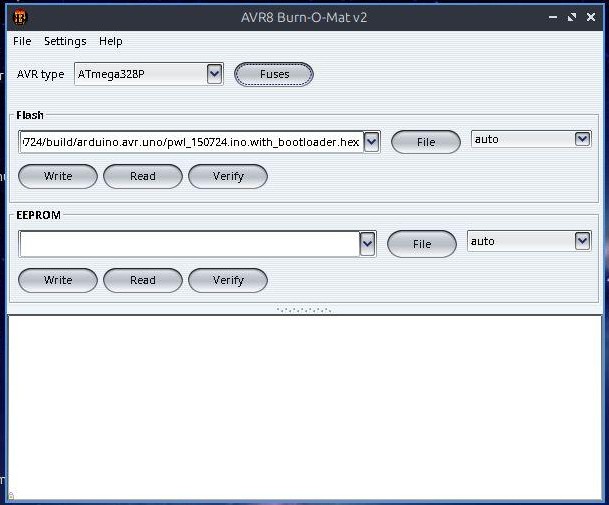
- Open AVR8 Burn-O-Mat and select the combined program and bootloader hex file produced above.

- Set the processor to ATMega328P.
- Under settings, set the location of AVRdude on the system - probably /usr/bin/avrdude.
- Alternative AVRdude configuration file - /etc/avrdude.conf.
- Programmer - we are using the USBasp.
- Port - USB.
- Additional options - include "-B 125kHz".
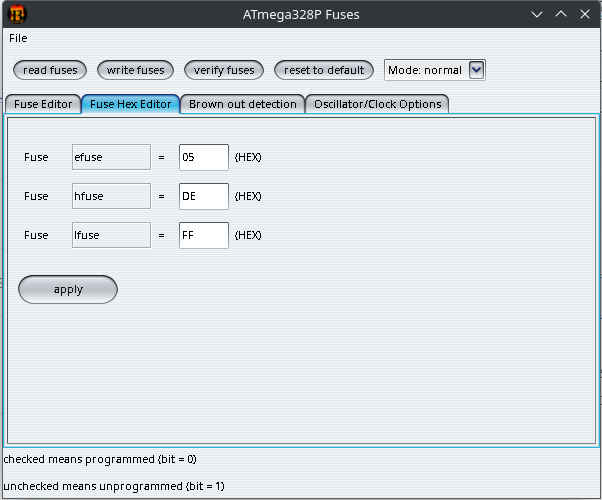
- Next to the AVR type, click the Fuses button and click the Fuse Hex Editor tab.

- Set the fuses to efuse = 05, hfuse = DE, ifuse = FF (you might require something different for your particular project) and click the "apply" button.
- Open the Oscillator/Clock Options tab and check that it is set for a low power crystal oscillator in the 8MHz - 16MHz range and that divide clock by 8 is deselected - the hex values in the previous step should have taken care of this.
The board can now be programmed via the ISP 6-pin interface. Click on the "Write" button, then on the Fuses page click on the "Write Fuses" button.
